Guide to Using the Comflowy API
Currently, we only support backend API calls, but we plan to support API calls based on the frontend SDK in the future.
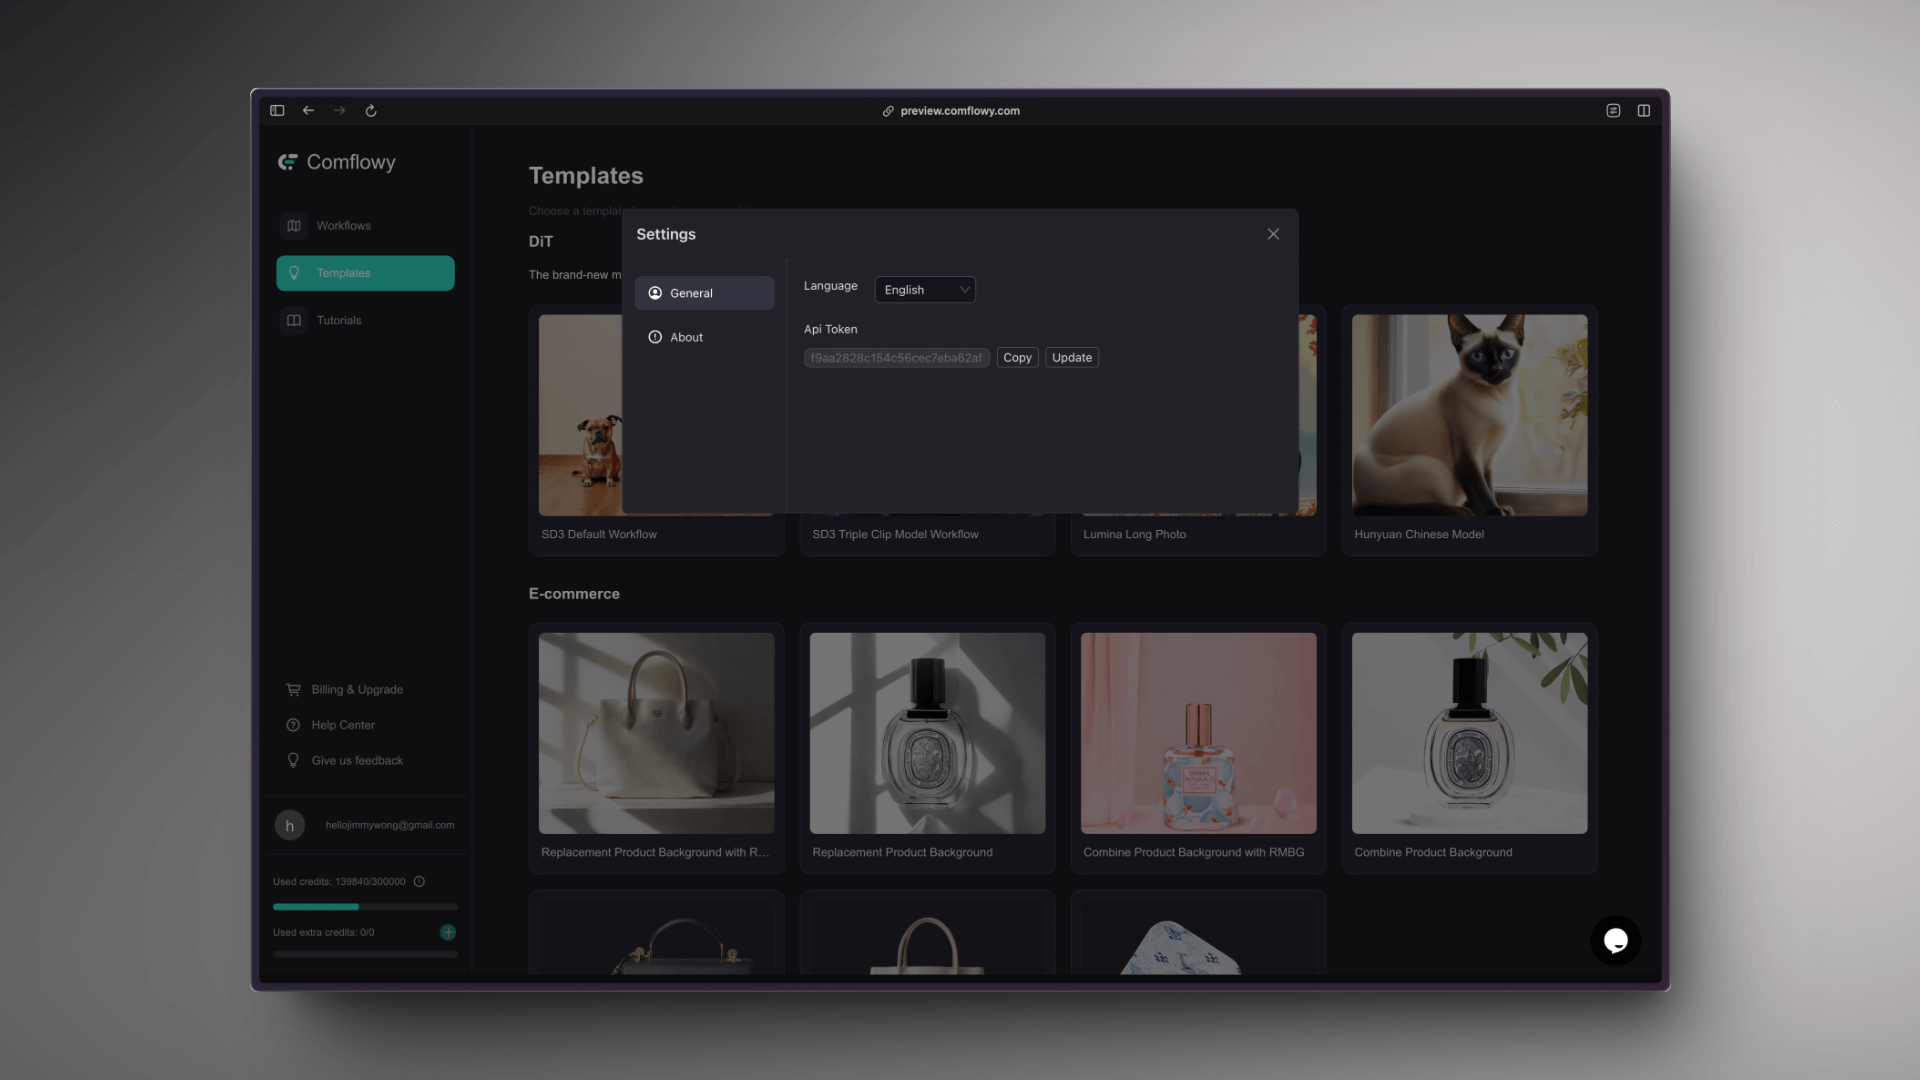
Step One: Get Your API KEY
In the homepage settings, you'll find your personal API Key. Click the Copy button to copy and save the API Key.
Step Two: Obtain Access_Token Using Your API KEY
  const GET_API = `https://app.comflowy.com/api/open/v0/auth/token?ppt=${API_KEY}`
  const type RESPONSE = {
      access_token: string
  }
Step Three: Run Workflows Using ACCESS_TOKEN
Find the Workflow ID
Select the workflow you want to use in the API, and open the workflow editing page. You can find the workflow ID in the URL. For example:
https://app.comflowy.com/app?id=3fef208b-7d25-4d9a-8ec9-c79eb21532343fef208b-7d25-4d9a-8ec9-c79eb2153234 is the workflow ID.
Request to Run API and Parameters
// Method: POST
// Header: {"Authorization": `Bearer ${ACCESS_TOKEN}`}
const RUN_API = `https://app.comflowy.com/api/open/v0/run`
type RUN_POST_PAYLOAD = {
    workflow_id: string;
    params: Record<string, any>;
    callback_urls: {
        on_result_url: string;
    }
}
type RUN_POST_RESULT = {
    success: boolean;
    data: {
        run_id: string
    }
}
Result Request Parameters
    type ON_RESULT_PAYLOAD = {
      type: "success" | "failed",
      error?: string;
      run_id: string;
      output_images: string[];
      full_outputs: Record<NodeId, {images: string[]}>
  }
  type ON_PROGRESS_EVENT_PAYLOAD = {
      type: "waiting" | "pending" | "running" | "message",
      payload: any
  }
Check the Run Result Based on run_id
  // Method: POST
  // Header: {"Authorization": `Bearer ${ACCESS_TOKEN}`}
  const CHECK_RUN_API = `https://app.comflowy.com/api/open/v0/check?id=${RUN_ID}`
  type CHECK_RUN_RESULT = {
      success: boolean;
      data: {
          status: "waiting" | "pending" | "running" | "success" | "failed";
          error?: string;
          output_images: string[];
          full_outputs: Record<NodeId, {images: string[]}>
      }
  }
Step Four: Configuring Workflow Parameter Variables
Open the browser console, right-click on the node input parameter field of the workflow you need twice in succession, and it will print the node information. The screenshot below shows what appears after I right-click on the Sampler inside KSampler (marked as ① in the image). The Console will display the following result:
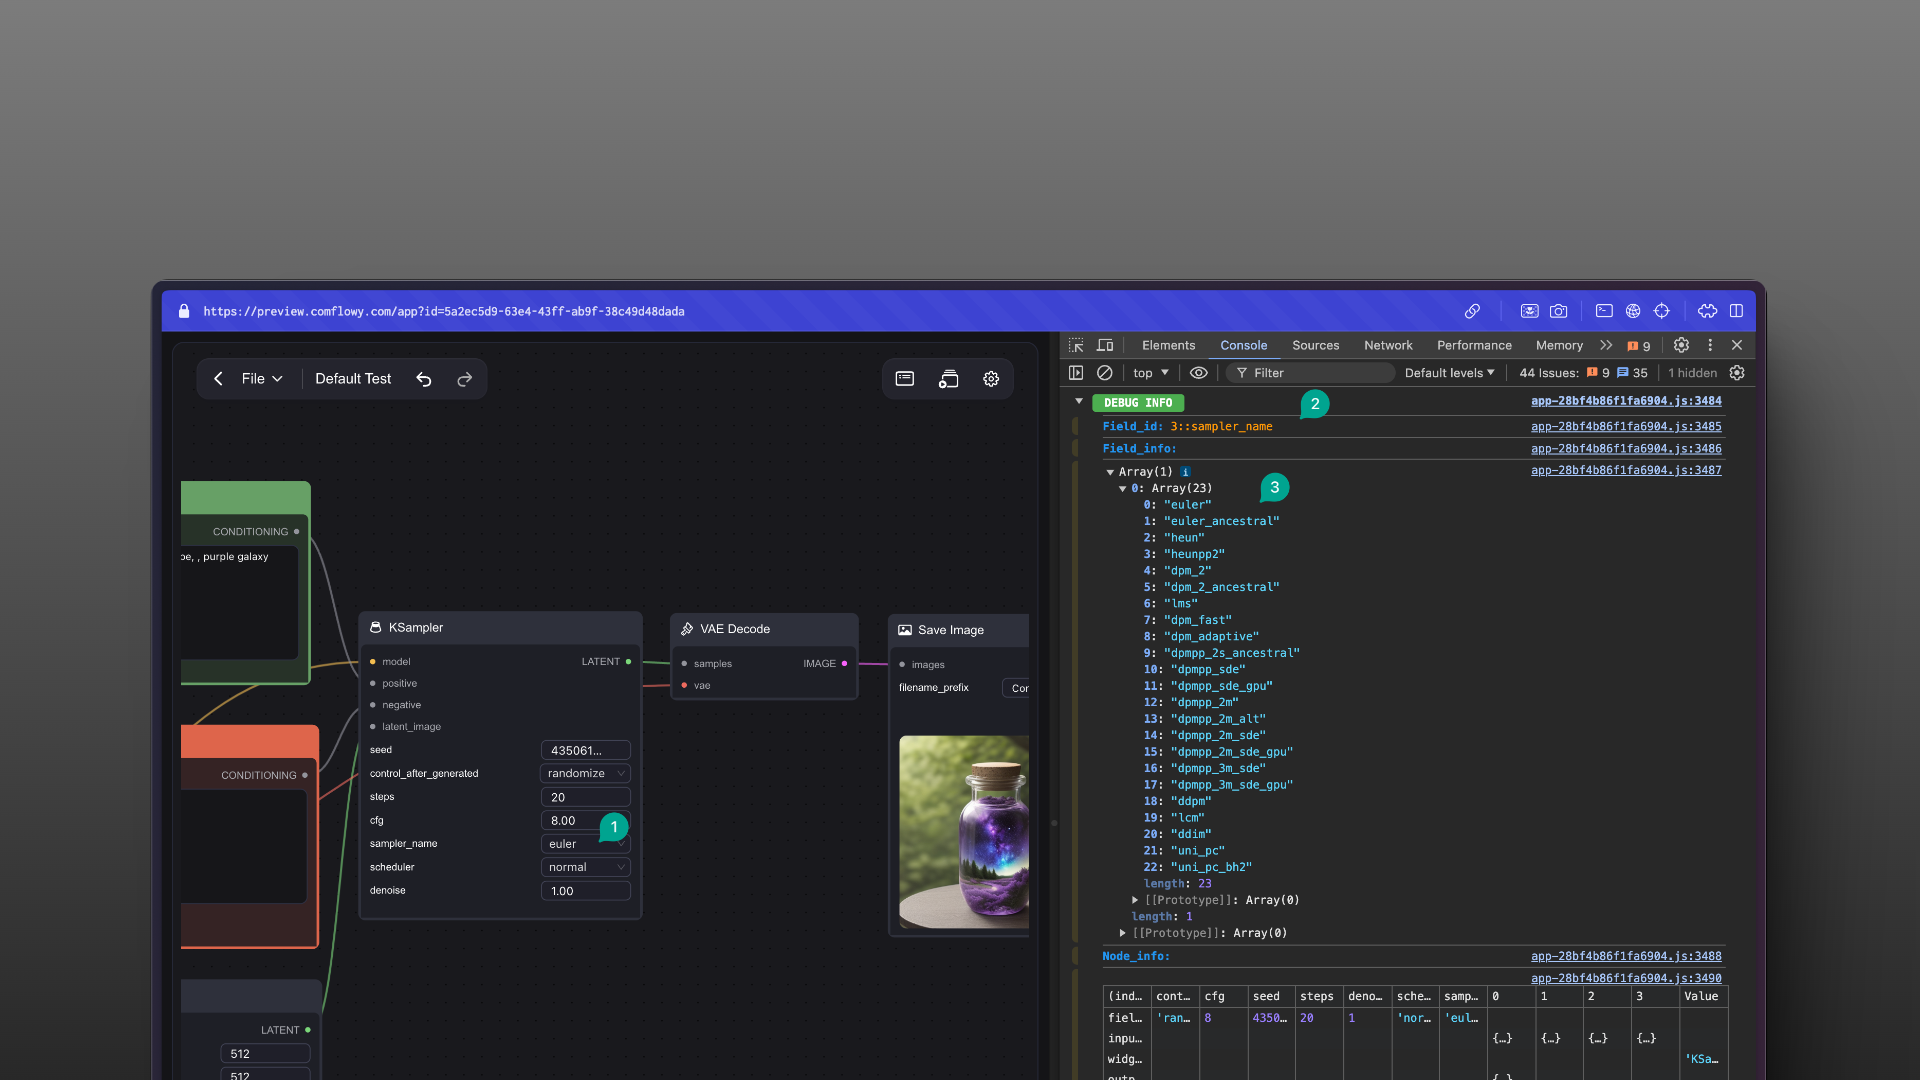
You need to use the node's Field_id (marked as ② in the image) as the variable name for your request parameters. Additionally, you can find the parameter corresponding to that variable in Field_info (marked as ③ in the image). For example, the selected one is a Select type, and you can find the corresponding options in Field_info.
Example request parameters:
const run_payload =
{
    workflow_id: "test_workflow_id";
    params: {
        "3::sampler_name": "euler",
        "6::text": "beautiful scenery nature glass bottle landscape, purple galaxy bottle,"
    },
    callback_urls: {
        on_result_url: "test_url",
        on_progress_event_url: "test_url"
    }
}