Getting Started with Comflowy
Attention! If you are using ComfyUI, you can skip this section.
If you are completely new to ComfyUI and it's your first time using Comflowy, this article will quickly introduce you to the basic usage of Comflowy.
Comflowy Cloud Version
First off, it's important to note that our cloud version does not support a free trial. If you want to use Comflowy's cloud version (opens in a new tab), you will need to subscribe and pay. If you're not keen on paying, you might want to try our local version.
① Creating the First Image
For the cloud version, all you need to do is register an account, and then you can start using it right away. So, compared to the local version, you skip the installation step. Plus, we have built-in numerous models that you can use without needing to download anything.
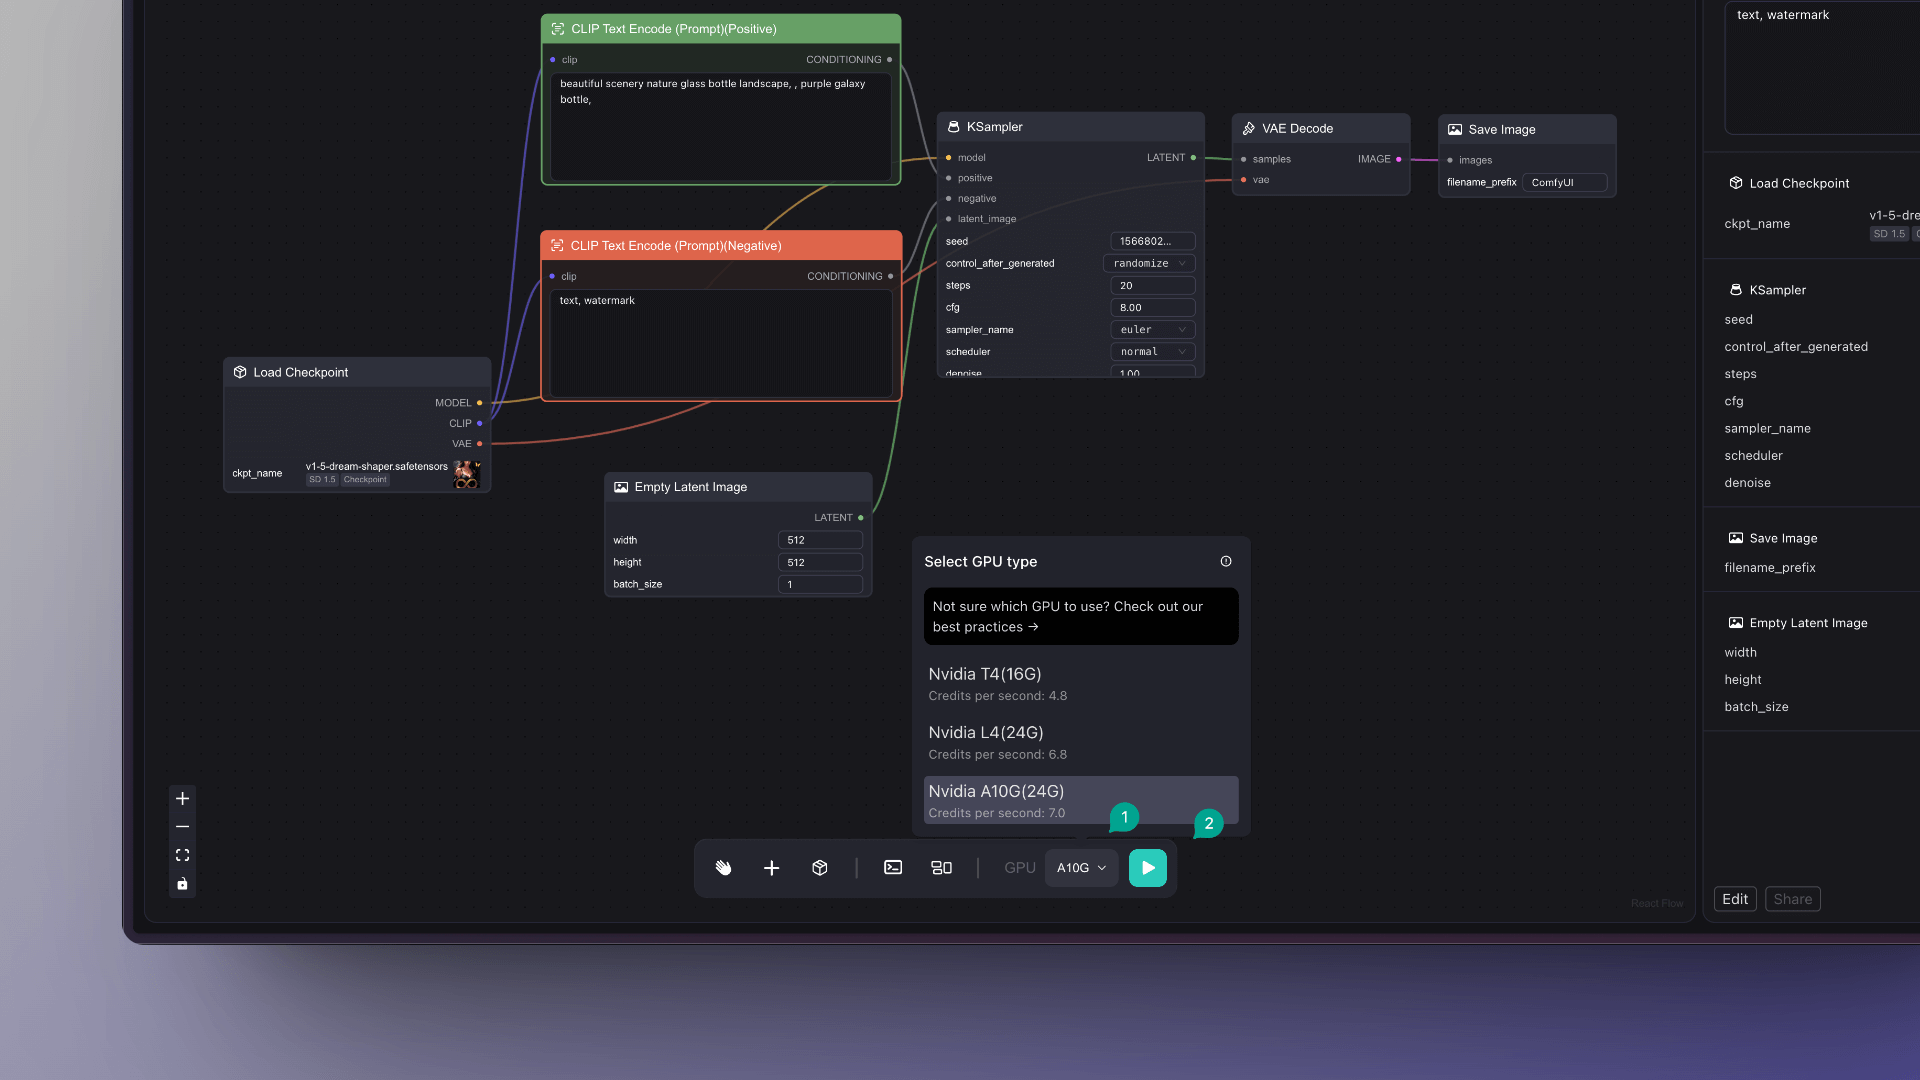
For first-time users, I suggest you create a new workflow and then run our default workflow. Click the Run button at the bottom (shown as 2 in the image) to start the workflow. You'll need to wait a little while, but after some time, you'll see the image.
Additionally, next to the Run button, there's a GPU option (shown as 1 in the image), which is supported by our cloud version. You can choose a different GPU based on your needs. I particularly recommend the A10G. For a detailed introduction to GPUs, please check out our help center documentation (opens in a new tab).
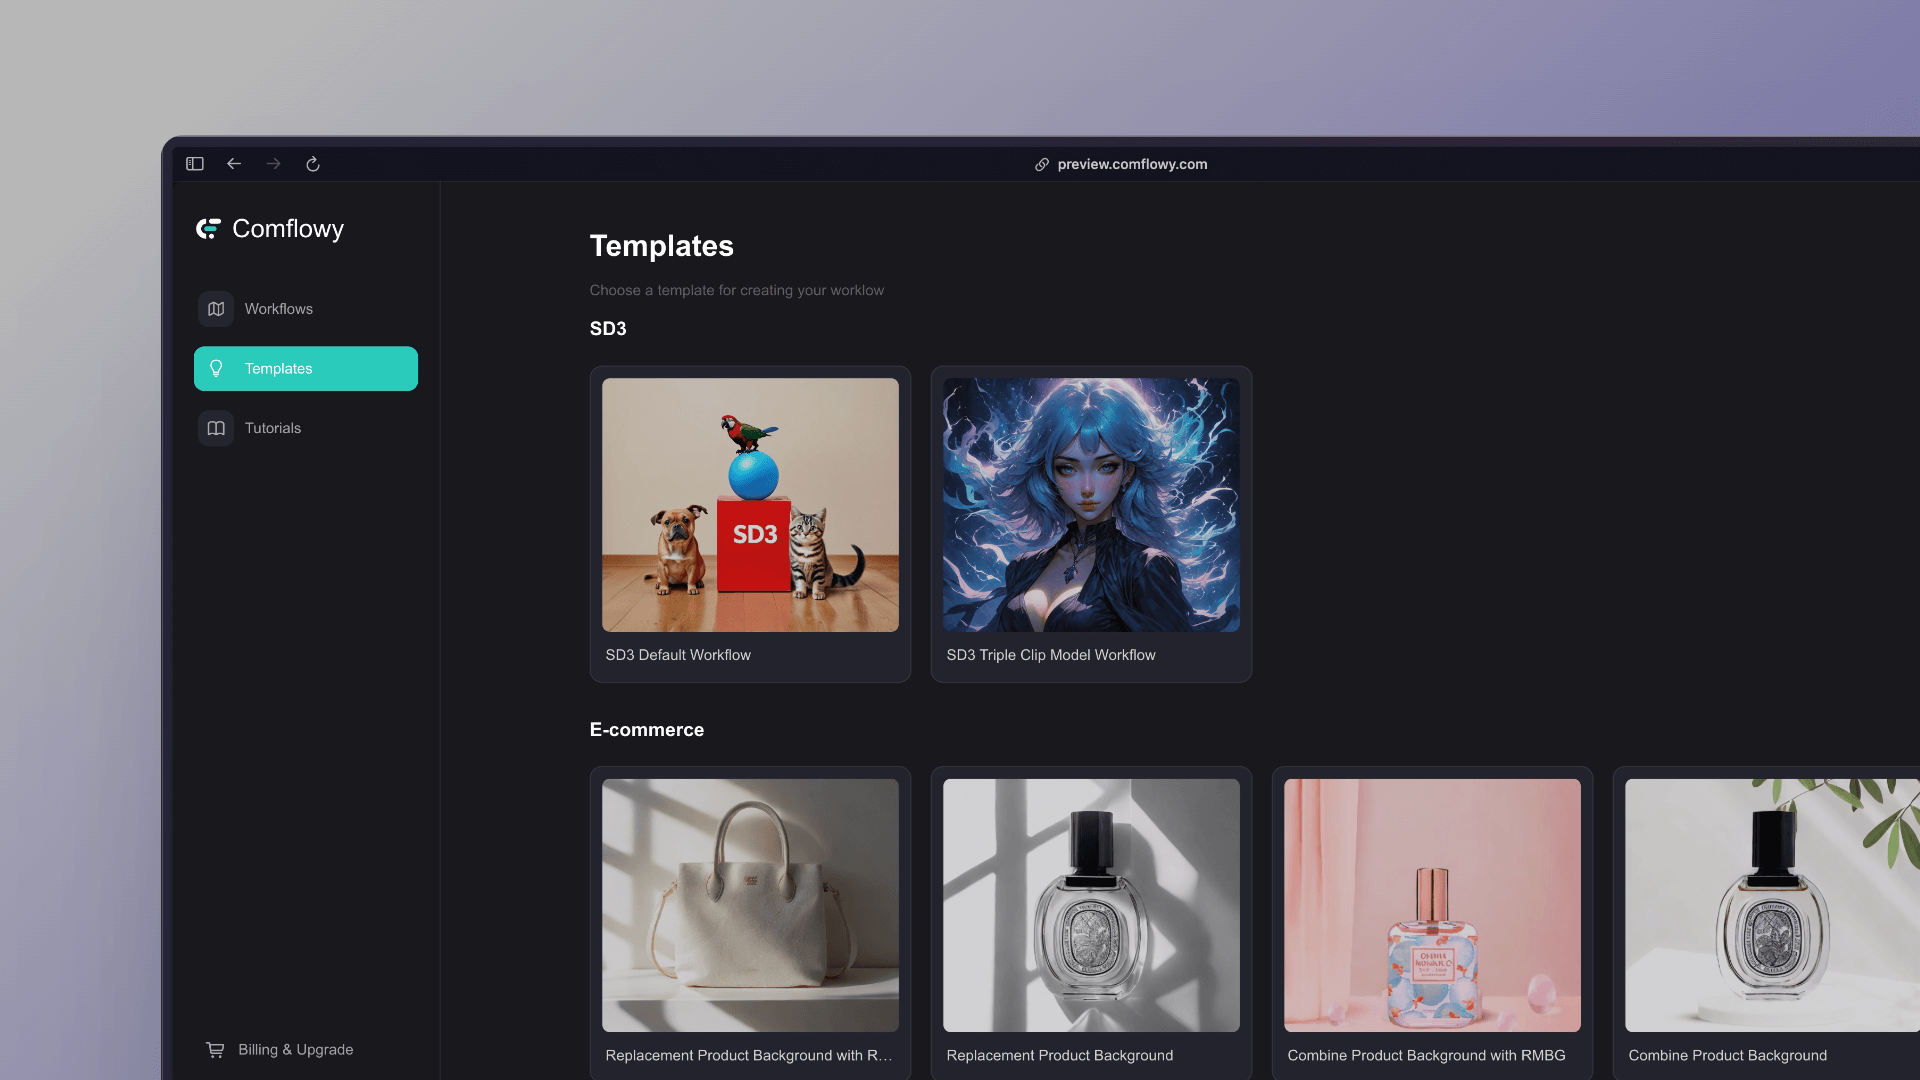
② Trying Built-in Templates
The cloud version of Comflowy includes numerous templates that you can choose and try out.
③ Continue Learning the Tutorial
Congratulations 🎉 You have mastered the most basic way to use Comflowy. Next, you can learn other sections according to your needs.
I strongly suggest starting with the basics of Stable Diffusion. This way, you'll better understand the principles behind AI-generated images and use Comflowy more effectively.


If you're interested in further learning about text-to-image generation techniques, you can check out the following sections:


If you'd like to learn some image-to-image generation techniques, you can check out the following sections:


Comflowy Local Version
① Installation
First, you need to install Comflowy or ComfyUI. You can refer to the following sections to learn how to install Comflowy or ComfyUI:

② Download the Model
After completing the installation, you cannot use the product to generate images immediately. You need to download a model. Depending on your computer’s specifications, I will recommend different models.
- If you have a Windows PC with less than 4GB of VRAM, or an M series MacBook with less than 16GB of memory, I recommend using Stable Diffusion v1.5 or a model fine-tuned based on it, such as DreamShaper V8.0.
- If your computer has better specifications with more than 8GB of VRAM, or an M series MacBook with more than 16GB of memory, I would suggest using Stable Diffusion XL or a model fine-tuned based on it, such as DreamShaper XL.
- Additionally, if you would like to learn in detail how to download and import models, you can view the tutorial in the following sections.


③ Importing the Model
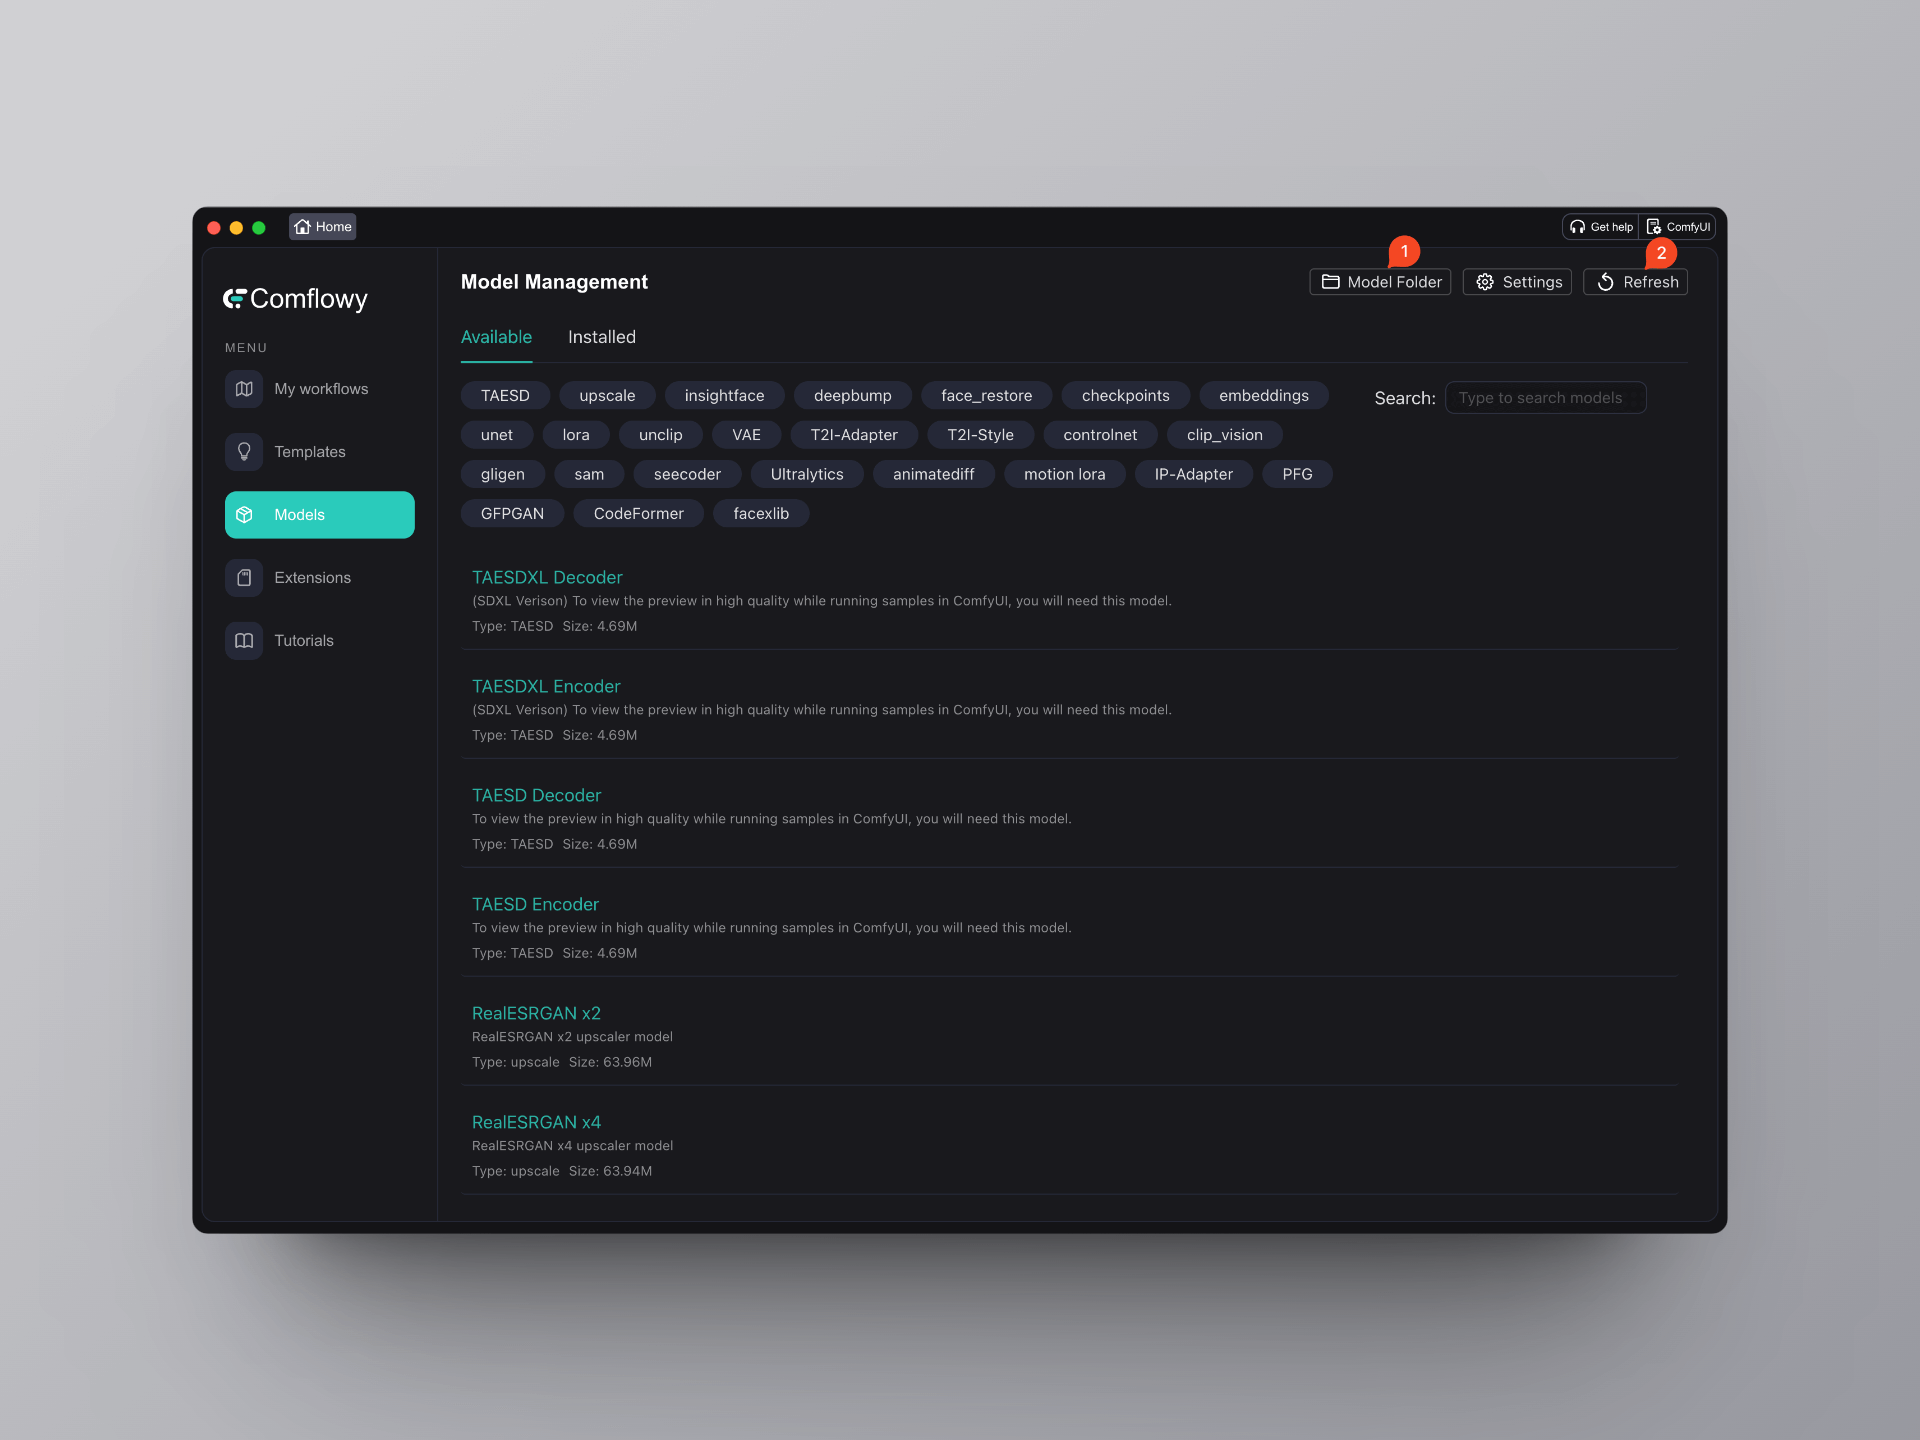
Once you have downloaded the model, you need to import it into a folder named 'checkpoint'. If you are using Comflowy, you can switch to the Models interface, then click on the 'Model Folder' button at the top right corner (indicated by ① in the image), After opening the folder, click to enter the 'checkpoint' folder inside and place the model you downloaded into it. Finally, click the 'Refresh' button (indicated by ② in the image).
④ Generating Your First Image
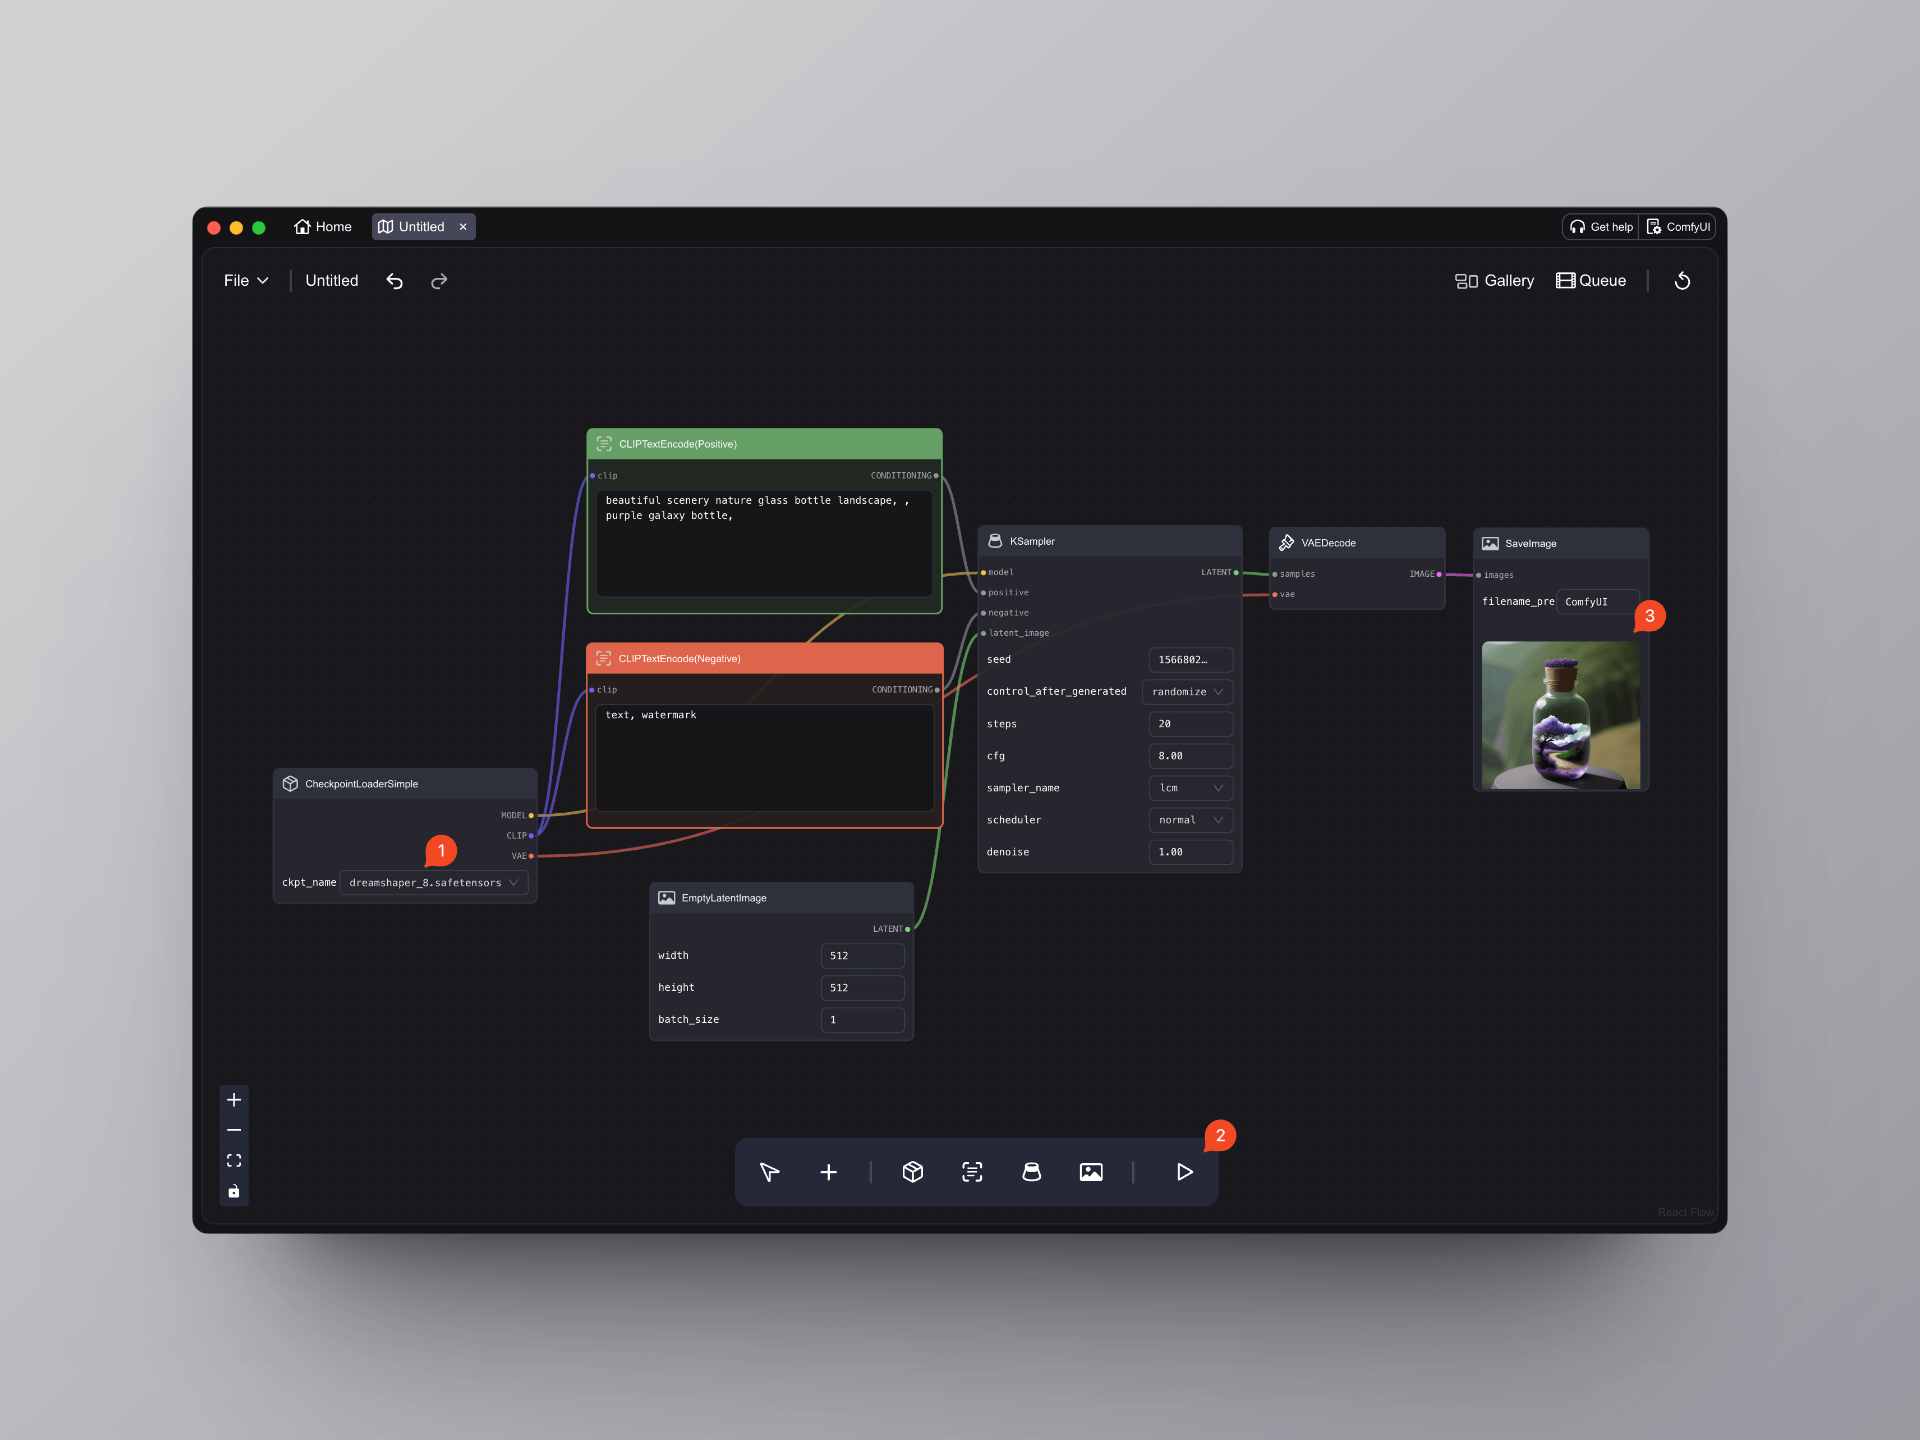
After importing the model into the folder and refreshing the system, you can click on the My Workflow interface, then click the New Workflow button to enter the Workflow interface. Now you can select the model you downloaded earlier from the node dropdown menu on the far left (indicated by ① in the image), then click the Generate button below (indicated by ② in the image). After waiting patiently for a while, you'll see the generated image in the node on the far right (indicated by ③ in the image).
⑤ Advanced Learning
Congratulations 🎉 You have learned the most basic way to use Comflowy. Next, you can learn the corresponding chapters based on your own needs.
However, I strongly suggest that you first learn the fundamentals of Stable Diffusion. This will give you a better understanding of the principles behind AI image generation, and you will be able to use Comflowy more effectively:
If you're interested in further learning about text-to-image generation techniques, you can check out the following sections:
If you'd like to learn some image-to-image generation techniques, you can check out the following sections: